Securing Kubernetes: A Step-by-Step Guide to Issuing Let's Encrypt Certificates with cert-manager
What is Let's Encrypt ?
Let’s Encrypt is a non-profit certificate authority run by Internet Security Research Group (ISRG) that provides X.509 certificates for Transport Layer Security (TLS) encryption at no charge. It is the world’s largest certificate authority, used by more than 300 million websites, with the goal of all websites being secure and using HTTPS. The Internet Security Research Group (ISRG), the provider of the service, is a public benefit organization. Major sponsors include the Electronic Frontier Foundation (EFF), the Mozilla Foundation, OVH, Cisco Systems, Facebook, Google Chrome, Internet Society, AWS, NGINX, and Bill and Melinda Gates Foundation. Other partners include the certificate authority IdenTrust, the University of Michigan (U-M), and the Linux Foundation.
The mission for the organization is to create a more secure and privacy-respecting World-Wide Web by promoting the widespread adoption of HTTPS. Let’s Encrypt certificates are valid for 90 days, during which renewal can take place at any time. This is handled by an automated process designed to overcome manual creation, validation, signing, installation, and renewal of certificates for secure websites. The project claims its goal is to make encrypted connections to World Wide Web servers ubiquitous. By eliminating payment, web server configuration, validation email management and certificate renewal tasks, it is meant to significantly lower the complexity of setting up and maintaining TLS encryption.
This guide is a continuation of a previous guide I wrote on how to use self-signed certificates on Kubernetes.
In this tutorial i will guide you how to secure your webapp running on kubernetes with ‘Let’s Encrypt’ certificate.
we will create a secret and both staging and production cluster issuers which will issue our certificates.
and when the config will be complete we will test it with NGINX.
Prerequisits:
A kubernetes cluster with cert manager installed.
A domain name managed by CF and an ‘A’ record that points to your kubernetes IP address.
I am using ‘work-in-progress.pics’ domain for this tutorial.
The essential component needed to obtain a certificate is the issuer.
The issuer represents the certificate authority.
There are two kinds of issuers: one that issues certificates for a single namespace and another, called a ‘ClusterIssuer’, that can handle the entire cluster and all its namespaces.
In this example, we will deploy the ‘ClusterIssuer’.
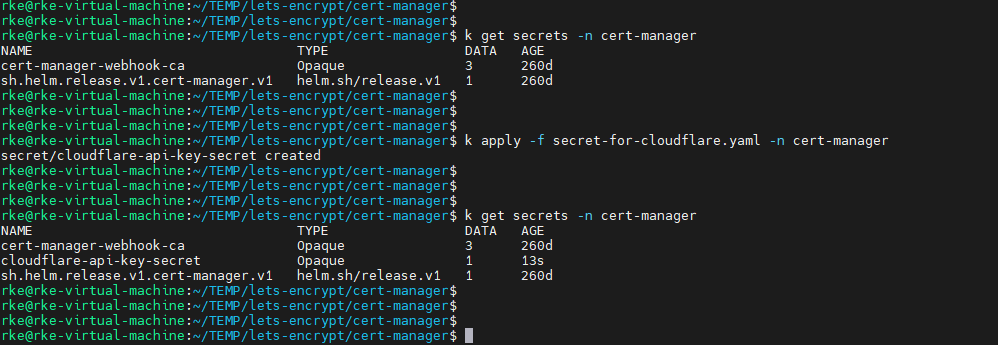
Before configuring the issuer, let’s create a secret that will hold Cloudflare credentials. We will need these credentials to authenticate with Cloudflare during the DNS-01 challenge.
We will create this secret in the ‘cert-manager’ namespace because it will be used by the cert-manager to issue certificates.
Using cert-manager with a ‘ClusterIssuer’ provides a centralized and scalable solution for managing certificates across your Kubernetes cluster. This approach not only simplifies certificate management but also enhances security by automating the renewal process, ensuring that your applications always have valid certificates without manual intervention.
Create a secret to authenticate to Cloud Flare
Create ‘secret-for-cloudflare.yaml’ file, populate it with the following block and deploy it to ‘cert-manager’ namespace.
you can use api-key or token, in this one we will go with api-key, which you need to get from CloudFlare.
kubectl apply -f secret-for-cloudflare.yaml -n cert-managerapiVersion: v1
kind: Secret
metadata:
name: cloudflare-api-key-secret
namespace: cert-manager
type: Opaque
stringData:
# Configure your API Key or Token
# API Key:
api-key: <your-api-key>
# - or -
# Token:
# api-token: your-api-token
Let's Encrypt Cluster Issuer
Next proceed to the issuer, it represents the certificate authority, in our case it is a ‘ClusterIssuer’ that will cover the entire cluster, and deployed not in a specific namespace but cluster wide.
I strongly advice to set things first with ‘staging’ certificate, be sure that it is running smoothly and then change to ‘production’ certificate, just in case you will need to do some ‘back and forth’ on the flow.
Create a ‘cluster-issuer-staging.yaml’ file and populate it with the following block, and add the resource to kubernetes. (kubectl apply…).
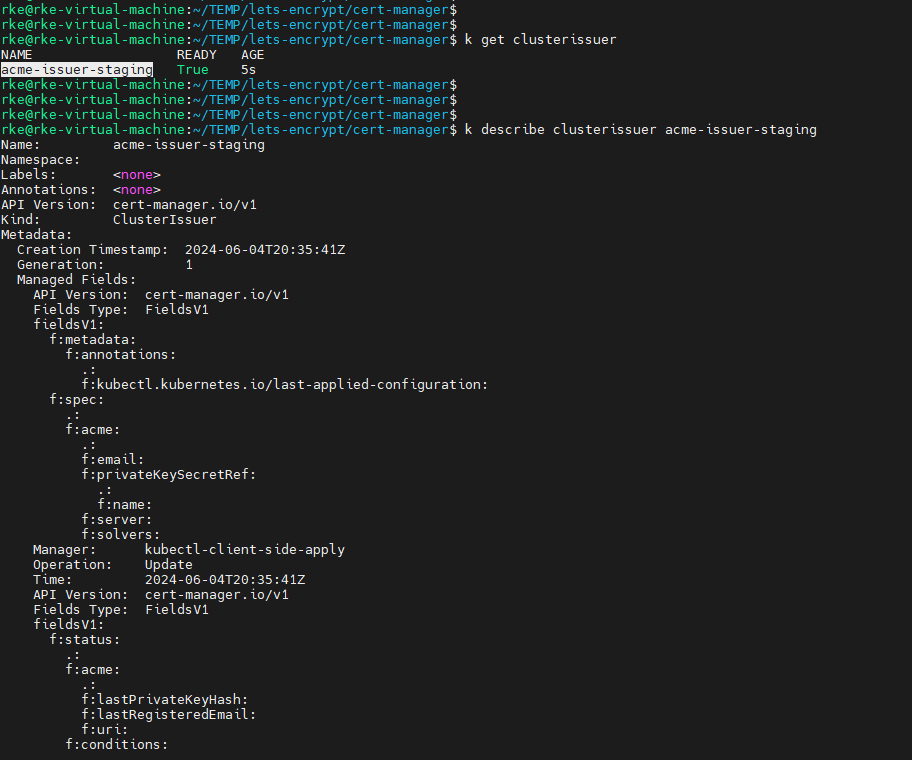
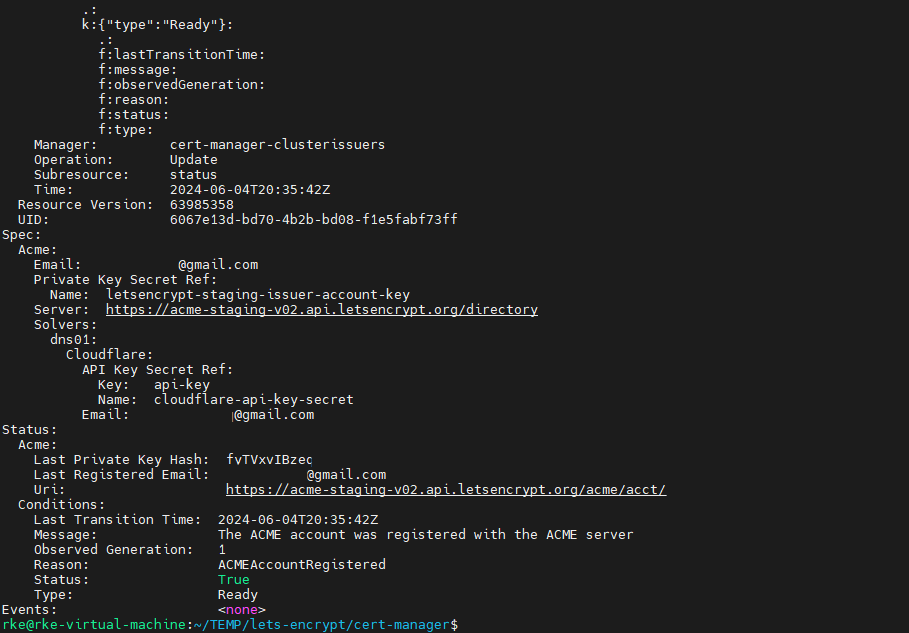
then you can describe it just to take a look and make sure it’s state is true.
apiVersion: cert-manager.io/v1
kind: ClusterIssuer
metadata:
  name: acme-issuer-staging
spec:
  acme:
    # Configure your email here...
    email: <[email protected]>
    # Configure your server here...
    # Letsencrypt Production
    # server: https://acme-v02.api.letsencrypt.org/directory
    # - or -
    # Letsencrypt Staging
    server: https://acme-staging-v02.api.letsencrypt.org/directory
    privateKeySecretRef:
      name: letsencrypt-staging-issuer-account-key
    solvers:
    # Configure DNS or HTTP Challenge here...
    # DNS Challenge:
    - dns01:
        # Configure your DNS Provider here...
        cloudflare:
          email: <[email protected]>
        # API Key:
          apiKeySecretRef:
            name: cloudflare-api-key-secret
            key: api-key
        # - or -
        # API Token:
        #   apiTokenSecretRef:
        #     name: cloudflare-api-token-secret
        #     key: api-token

      # (Optional) Add DNS selectors
      # selector:
      #   dnsZones:
      #   - 'your-domain'
    # HTTP Challenge:
    # - http01:
    #    ingress:
    #      class: nginx
kubectl apply -f cluster-issuer-staging.yaml

kubectl get clusterissuer

kubectl describe clusterissuer acme-issuer-staging
Let's Encrypt certificate for staging
Now let’s proceed to certificate, as mentioned earlier we will use staging just to make sure everything operates correctly and put it in the namespece that will contain the resources that will be using it, in our case it will be NGINX, therefore we need to create the namespace as well.
create a yaml file and name it ‘staging-certificate.yaml’, populate it with the following code block and run the below set of commands to create a namespace, create the certificate and check it’s status.
after creating the certificate in kubernetes you can check ‘certificaterequest’ to get the status of the request.
it might take time until the ‘READY’ will transform to ‘True’ but is should eventually :>
apiVersion: cert-manager.io/v1
kind: Certificate
metadata:
  name: nginx-crt-for-nginx.work-in-progress.pics
  namespace: aaa-sandbox-03-letsencrypt-certificate-nginx
spec:
  secretName: nginx-crt
  issuerRef:
    name: acme-issuer-staging
    kind: ClusterIssuer
  dnsNames:
    - 'work-in-progress.pics'
kubectl create ns aaa-sandbox-03-letsencrypt-certificate-nginx
kubectl apply -f staging-certificate.yaml -n aaa-sandbox-03-letsencrypt-certificate-nginx
kubectl get certificaterequest -n aaa-sandbox-03-letsencrypt-certificate-nginx
And this is the secret created.
kubectl get secret -n aaa-sandbox-03-letsencrypt-certificate-nginx
NGINX deployment.
Well good! It seems that we are ready to check that thing with NGINX or something….
This is a very simple deployment of an NGINX server, i have used it in the tutorial where i explain how to use self-signed certificates on Kubernetes. it contains latest nginx, a service, ingress, and a config map that will be mounted to the container and hold the certificate that will be used by NGINX.
Run it with kubectl apply -f
apiVersion: apps/v1
kind: Deployment
metadata:
  name: nginx-deployment-with-letsencrypt-certificate
  namespace: aaa-sandbox-03-letsencrypt-certificate-nginx
spec:
  replicas: 1
  selector:
    matchLabels:
      app: nginx
  template:
    metadata:
      labels:
        app: nginx
    spec:
      containers:
      - name: nginx
        image: nginx:latest
        volumeMounts:
        - name: nginx-config
          mountPath: /etc/nginx/nginx.conf
          subPath: nginx.conf
        - name: tls-secret
          mountPath: /etc/nginx/certs
          readOnly: true
      volumes:
      - name: nginx-config
        configMap:
          name: nginx-config
      - name: tls-secret
        secret:
          secretName: nginx-crt
---
apiVersion: v1
kind: Service
metadata:
  labels:
    app: nginx
  name: nginx-service
  namespace: aaa-sandbox-03-letsencrypt-certificate-nginx
spec:
  ports:
  - name: http
    port: 80
    protocol: TCP
    targetPort: 80
  - name: https
    port: 443
    protocol: TCP
    targetPort: 443
  selector:
    app: nginx
  externalTrafficPolicy: Local
  loadBalancerIP: 192.168.66.134
  type: LoadBalancer
---
apiVersion: v1
kind: ConfigMap
metadata:
  name: nginx-config
  namespace: aaa-sandbox-03-letsencrypt-certificate-nginx
data:
  nginx.conf: |
    events {
      worker_connections 1024;
    }
    http {
      server {
        listen 80;
        server_name nginx.work-in-progress.pics;

        location / {
          root /usr/share/nginx/html;
          index index.html;
        }
      }
      server {
        listen 443 ssl;
        server_name nginx.work-in-progress.pics;
        ssl_certificate /etc/nginx/certs/tls.crt;
        ssl_certificate_key /etc/nginx/certs/tls.key;

        location / {
          root /usr/share/nginx/html;
          index index.html;
        }
      }
    }
---
apiVersion: networking.k8s.io/v1
kind: Ingress
metadata:
  name: nginx-ingress
  namespace: aaa-sandbox-03-letsencrypt-certificate-nginx
  annotations:
    kubernetes.io/ingress.class: nginx
spec:
  tls:
    - hosts:
        - work-in-progress.pics
      secretName: nginx-crt
  rules:
    - host: work-in-progress.pics
      http:
        paths:
          - path: /
            pathType: Prefix
            backend:
              service:
                name: nginx-service
                port:
                  number: 80
    - host: work-in-progress.pics
      http:
        paths:
          - path: /
            pathType: Prefix
            backend:
              service:
                name: nginx-service
                port:
                  number: 443

Verification stage
Now lets test the certificate and verify that the issuer is Lets Encrypt.
I am connecting to some ec2 instance that is outside of my network just to test it and inspect the certificate details.
curl -k -v https://work-in-progress.pics 2>&1 | grep -A 20 'Server certificate'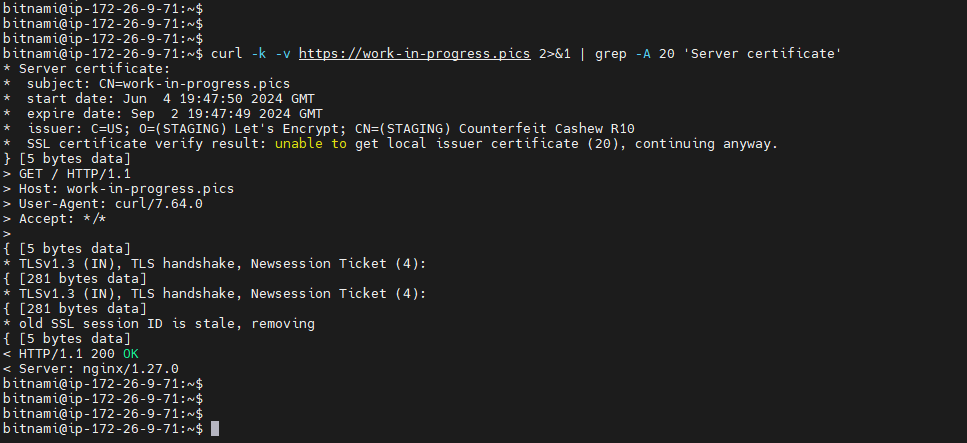
Going for Production
Here we can see that the issuer is lets encrypt and additional details like expiration date and stuff.
Now that you know it works with staging certificate let’s change the servers to production and create a production certificate.
note that here we are only creating a new issuer and certificate yamls.
you can edit the current files and refer to production but i suggest to create new yaml files with production values and apply them.
apiVersion: cert-manager.io/v1
kind: ClusterIssuer
metadata:
  name: acme-issuer-production
spec:
  acme:
    email: <[email protected]>

    # Configure server type.
    # Letsencrypt Production
    server: https://acme-v02.api.letsencrypt.org/directory

    privateKeySecretRef:
      name: letsencrypt-staging-issuer-account-key
    solvers:
    # Configure DNS or HTTP Challenge
    # DNS Challenge:
    - dns01:
        # Configure your DNS Provider
        cloudflare:
          email: <[email protected]>
        # API Key:
          apiKeySecretRef:
            name: cloudflare-api-key-secret
            key: api-key
apiVersion: cert-manager.io/v1
kind: Certificate
metadata:
  name: nginx-crt-for-nginx.work-in-progress.pics
  namespace: aaa-sandbox-03-letsencrypt-certificate-nginx
spec:
  secretName: nginx-crt
  issuerRef:
    name: acme-issuer-production
    kind: ClusterIssuer
  dnsNames:
    - 'work-in-progress.pics'
kubectl apply -f clusterissuer-acme-production.yaml && \
kubectl apply -f production-certificate.yaml -n aaa-sandbox-03-letsencrypt-certificate-nginxAnd as previously it might take a minute or two until the certificaterequest turns true.
kubectl get certificaterequest -n aaa-sandbox-03-letsencrypt-certificate-nginx
Now it is time to redeploy our nginx to make it use the production certificate, and test it :>
if you havn’t changed names for the certificate and it is named as the stagging certificate then you will have to delete the deployment completely and redeploy, cuz the cert that was loaded as staging didn’t change therefore kubernetes doesn’t understand that something was changed and does not load the production certificate.

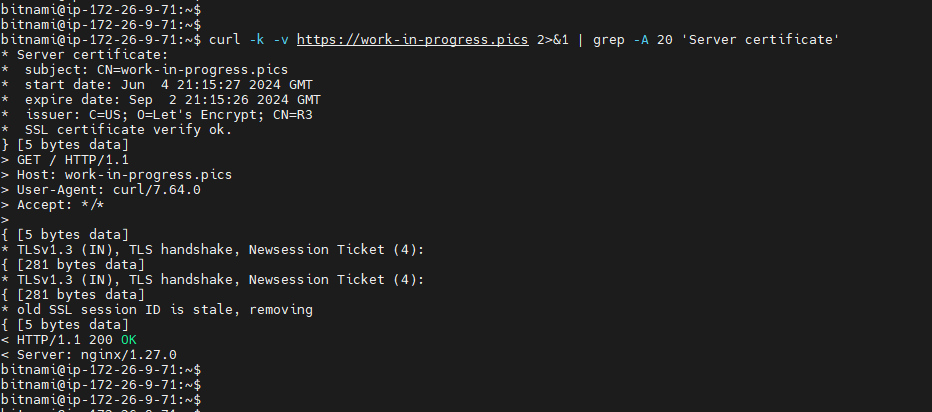
Curl once again and this time you will not see the ‘staging’ label, your certificate is real :>
To conclude the session, today we secured our web application with a certificate issued by Let’s Encrypt.
We achieved this by creating a secret in the ‘cert-manager’ namespace so that cert-manager could authenticate with Cloudflare and complete the DNS-01 challenge triggered by the ‘ClusterIssuer’ that we deployed cluster-wide. Finally, we deployed NGINX to test that it is using the Let’s Encrypt certificate.
